
Layer Up: Economical Techniques for Filling Deep Raised Beds
Filling a deep raised bed economically and efficiently is a savvy gardening tactic, especially for those aiming to maximize yields without overspending. Deep raised beds offer a plethora of advantages, including improved drainage, enriched soil quality, and easier planting and maintenance. However, the task of filling them can seem daunting in terms of cost and effort. This article aims to guide you through a budget-friendly and straightforward approach to prepare your deep raised bed for planting.

Understanding the Benefits of Deep Raised Beds
Deep raised beds, typically ranging from 12 to 36 inches in height, provide ample room for plant roots to flourish, ensuring optimal growth and health. They promote superior drainage, particularly beneficial in areas with poor native soil or limited gardening space, ultimately leading to higher yields and healthier plants.
Step 1: Planning Your Raised Bed
- Dimensions: Determine the size of your raised bed, aiming for a depth of at least 24 inches for most deep-rooted vegetables.
- Location: Select a sunny spot that receives a minimum of six hours of sunlight daily.
- Materials: Choose suitable materials for the sides of your raised bed, such as untreated wood, bricks, or cinder blocks.
Step 2: Layering for Affordability and Soil Enrichment
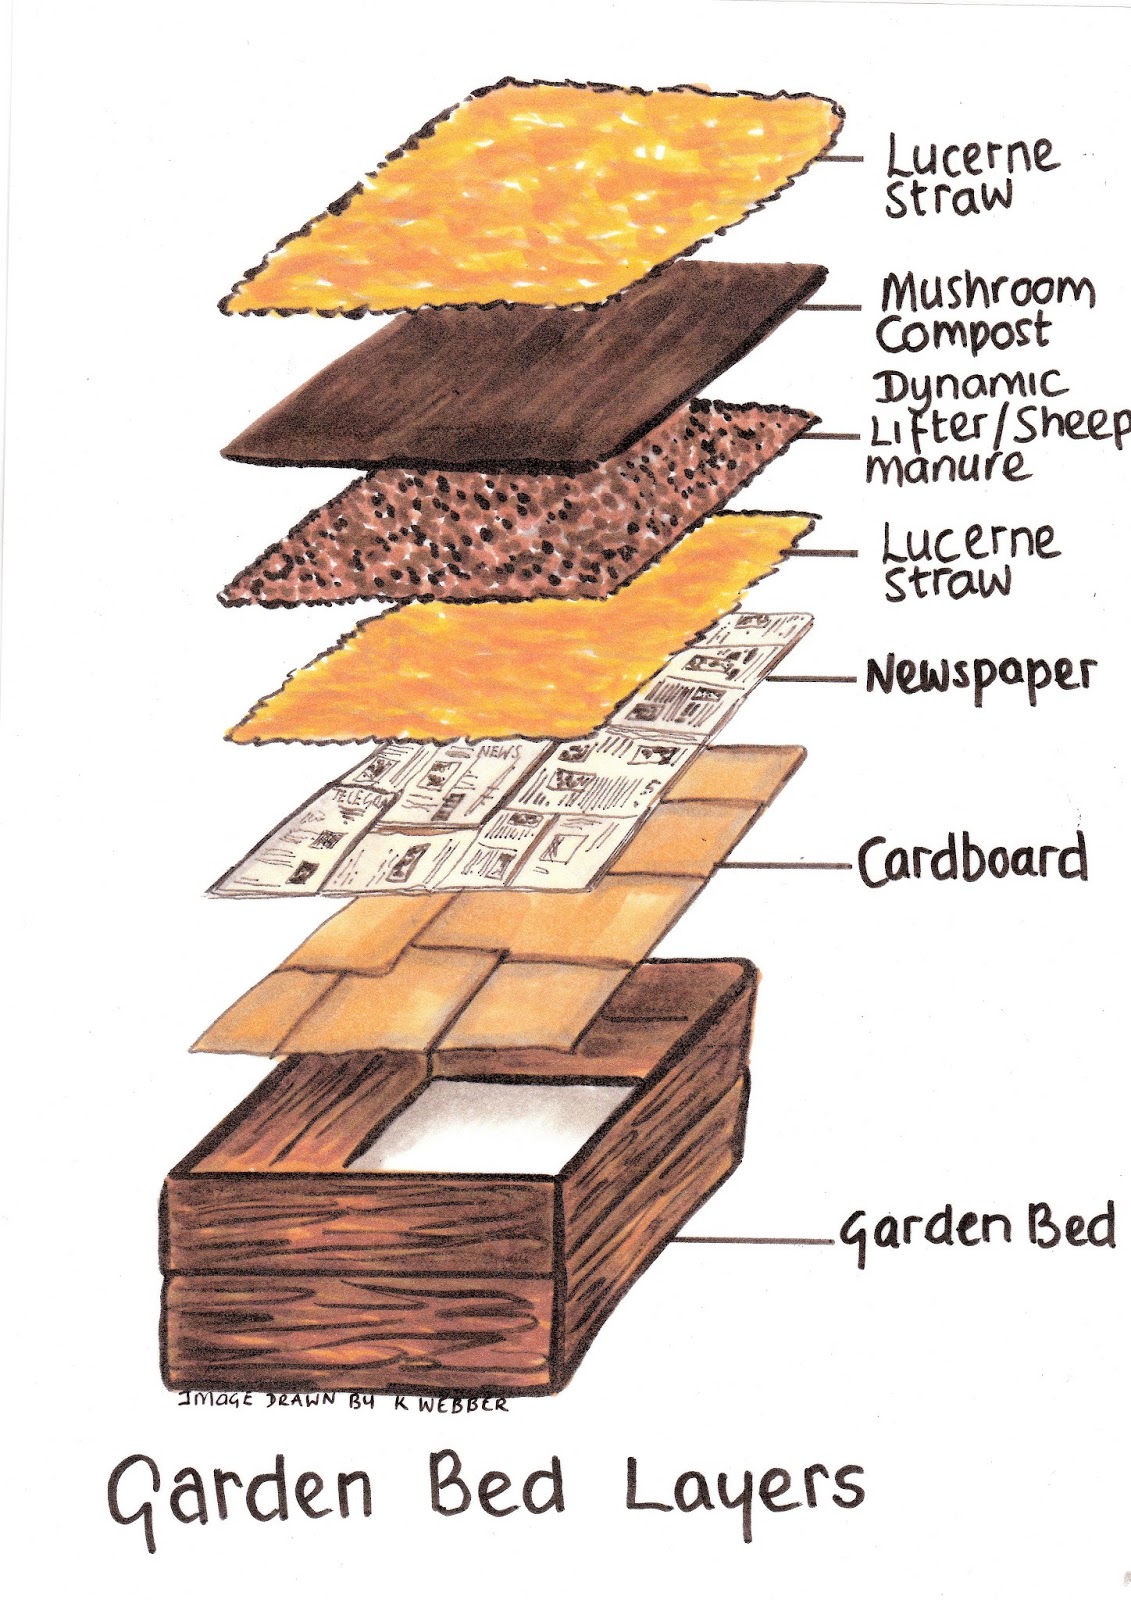
The key to filling a deep raised bed economically lies in employing a technique called “lasagna gardening” or “layering.” This method involves strategically stacking layers of different materials that decompose over time, enhancing soil structure and fertility.
- Bottom Layer (Drainage): Utilize rocks, gravel, or broken pottery to ensure adequate drainage, preventing waterlogging.
- Middle Layers (Bulk Material): Incorporate readily available organic materials like straw, logs, branches, leaves, grass clippings, and wood chips. Arrange larger items at the bottom, gradually adding smaller materials. These organic components will break down gradually, enriching the soil.
- Compost Layer: Introduce a layer of compost to introduce beneficial microorganisms and essential nutrients. Homemade compost from kitchen scraps and garden waste is an excellent option.
- Top Layer (Growing Medium): Complete the stack with a blend of quality topsoil mixed with compost. This mixture serves as the primary growing medium for your plants, promoting immediate planting and robust root development.
Step 4: Planting
- Selection: Choose plants suited to the depth and size of your raised bed. Deep-rooted vegetables like tomatoes, carrots, and potatoes thrive in deep raised beds.
- Method: Plant seeds or seedlings according to their spacing and depth requirements.
Step 5: Maintenance
- Watering: Deep raised beds may require more frequent watering to maintain consistent moisture levels, especially during dry spells. Water deeply to ensure thorough hydration.
- Mulching: Apply a layer of mulch to conserve moisture, suppress weeds, and regulate soil temperature.
Cost-Saving Tips
- Local Resources: Seek free or inexpensive organic materials locally, such as tree trimmings, leaves, or grass clippings.
- Community Resources: Some communities offer free compost or mulch to residents.
- DIY Composting: Reduce waste and enrich your soil by composting kitchen scraps and garden waste.
By following these steps, you can fill your deep raised bed affordably and sustainably, contributing to a greener garden and a bountiful harvest for seasons to come.


