
How to Build a Brick Walkway in Your Garden: A Step-by-Step Guide
Enhancing your garden with a brick walkway not only boosts its visual charm but also offers a practical trail through the serene beauty of your outdoor retreat. Constructing a brick walkway can be a gratifying DIY venture that imbues your abode with added value and personality. Here’s a straightforward roadmap to fashioning a striking and enduring brick walkway in your garden.
Step 1: Design and Planning
1.1. Visualize Your Path: Start by envisioning the trajectory of your walkway, considering its seamless integration into your garden’s landscape, its shape, and its intended purpose. Whether opting for a straight pathway exuding formality or a gently curved trail evoking a more relaxed ambiance, tailor the design to suit your preferences.
1.2. Choose Your Bricks: Select the type of bricks that best complement your vision. Whether opting for traditional clay bricks, sturdy concrete bricks, or the rustic allure of reclaimed bricks, consider their textures, colors, and durability in harmony with the overall design aesthetic of your garden and home.
1.3. Measure Your Space: Precisely gauge the dimensions of your walkway to determine its length and width. This crucial step facilitates accurate material calculations, ensuring you acquire the requisite number of bricks and other necessary materials.
Step 2: Preparation
2.1. Mark Your Path: Utilize stakes and string to outline the intended path of your walkway. This meticulous step ensures precision in delineating the route and aids in visualizing the final outcome.
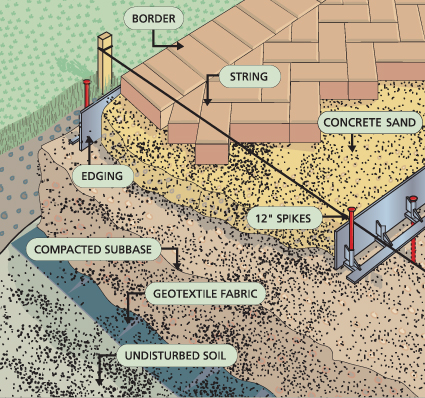
2.2. Excavate the Area: Dig up the soil along the designated path to a depth of approximately 8 inches, allowing ample space for the subsequent layers of base, sand, and bricks.
2.3. Create a Solid Base: Establish a sturdy foundation by laying a base of crushed stone or gravel with a thickness of about 4 inches. Thoroughly compact the base to prevent settling and ensure stability.
Step 3: Laying the Bricks
3.1. Add Sand Layer: Overlay the compacted base with a 2-inch layer of sand, facilitating leveling and providing a flexible bed for the bricks.
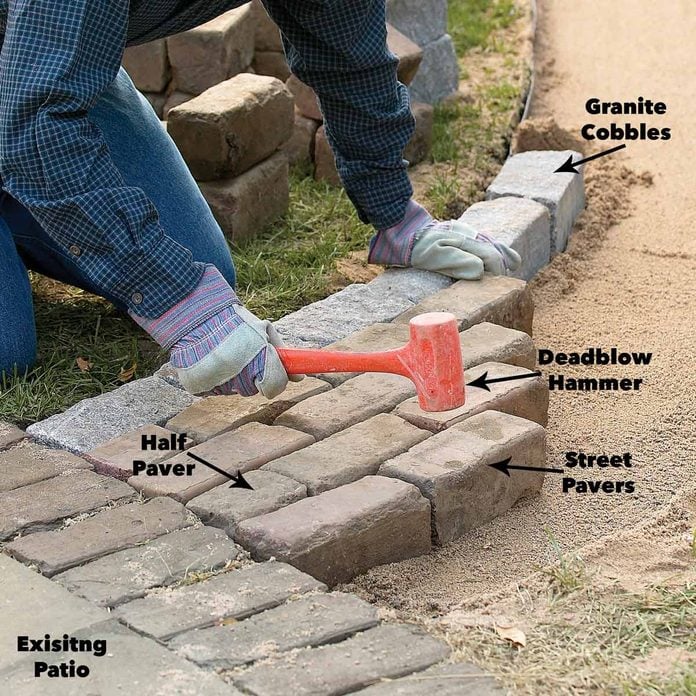
3.2. Start Laying Bricks: Commence laying bricks from one end of the path, firmly embedding each brick into the sand layer using a rubber mallet. Maintain tight spacing between bricks to prevent movement and ensure stability.
3.3. Cutting Bricks: Customize the layout as needed by cutting bricks to fit using a brick chisel and hammer or a masonry saw.
3.4. Ensure Level: Regularly check the levelness of the bricks and make necessary adjustments by adding or removing sand beneath them.

Step 4: Finishing Touches
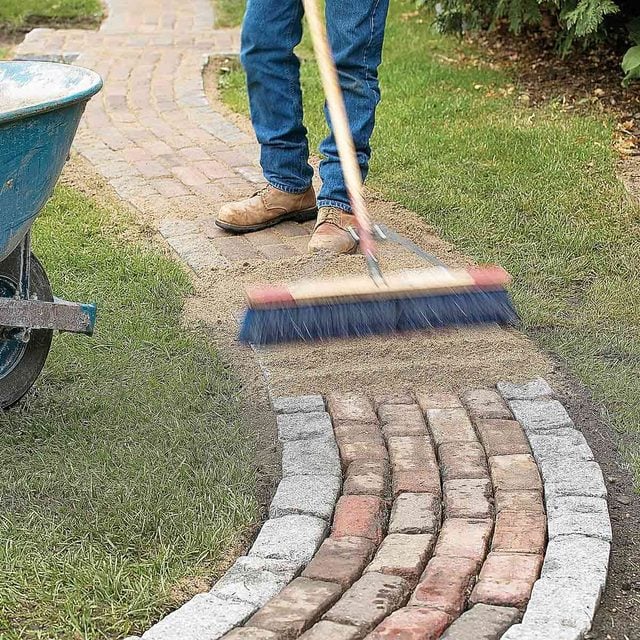
4.1. Fill the Joints: Once all bricks are laid, sweep sand over the walkway to fill the gaps between bricks, securing them in place.
4.2. Compact the Walkway: Gently compact the entire walkway using a hand tamper or a plate compactor to settle the bricks and sand.
4.3. Final Cleaning: Sweep the walkway clean of excess sand and debris, optionally rinsing it with water to settle the sand in the joints.
Step 5: Maintenance
5.1. Regular Inspection: Periodically inspect your walkway for loose or uneven bricks, facilitating prompt repairs to maintain its structural integrity.
5.2. Weed Control: Keep vigilant for weeds sprouting between bricks and promptly remove them by hand or with a natural herbicide.
5.3. Re-sanding: As needed, replenish the sand between bricks to uphold the walkway’s integrity over time.
Building a brick walkway in your garden is an attainable project that substantially elevates the functionality and beauty of your outdoor space. By following these steps, you can create a durable and appealing path that will endure for years to come. Embrace the process and relish the transformation of your garden landscape.


