
How To Build A Rain Barrel: A Step-by-Step Guide
Introduction: Constructing a rain barrel presents a practical and eco-friendly solution to conserve water and slash utility expenses. By harnessing rainwater, you can nurture your garden sustainably while reducing your ecological footprint. This article offers a user-friendly guide to crafting your rain barrel, empowering you to embark on this simple yet impactful DIY endeavor.
Materials Needed: Gather the following materials to commence your rain barrel project:
- A Large Barrel or Drum: Opt for a 55-gallon plastic drum for optimal capacity.
- Spigot: Facilitates easy access to collected water.
- Overflow Valve: Manages excess water to prevent overflow.
- Mesh Screen: Safeguards against debris and insects.
- Downspout Diverter or Flexible Downspout: Channels rainwater from the gutter into the barrel.
- Hose Clamp: Ensures secure fittings for the overflow valve and downspout.
- Silicone Sealant: Waterproofs connections for the spigot and overflow.
- Drill and Bits: Essential for creating holes in the barrel.
- Teflon Tape: Enhances thread seals for watertight connections.
- Cinder Blocks or Sturdy Stand: Elevates the barrel for improved water pressure.
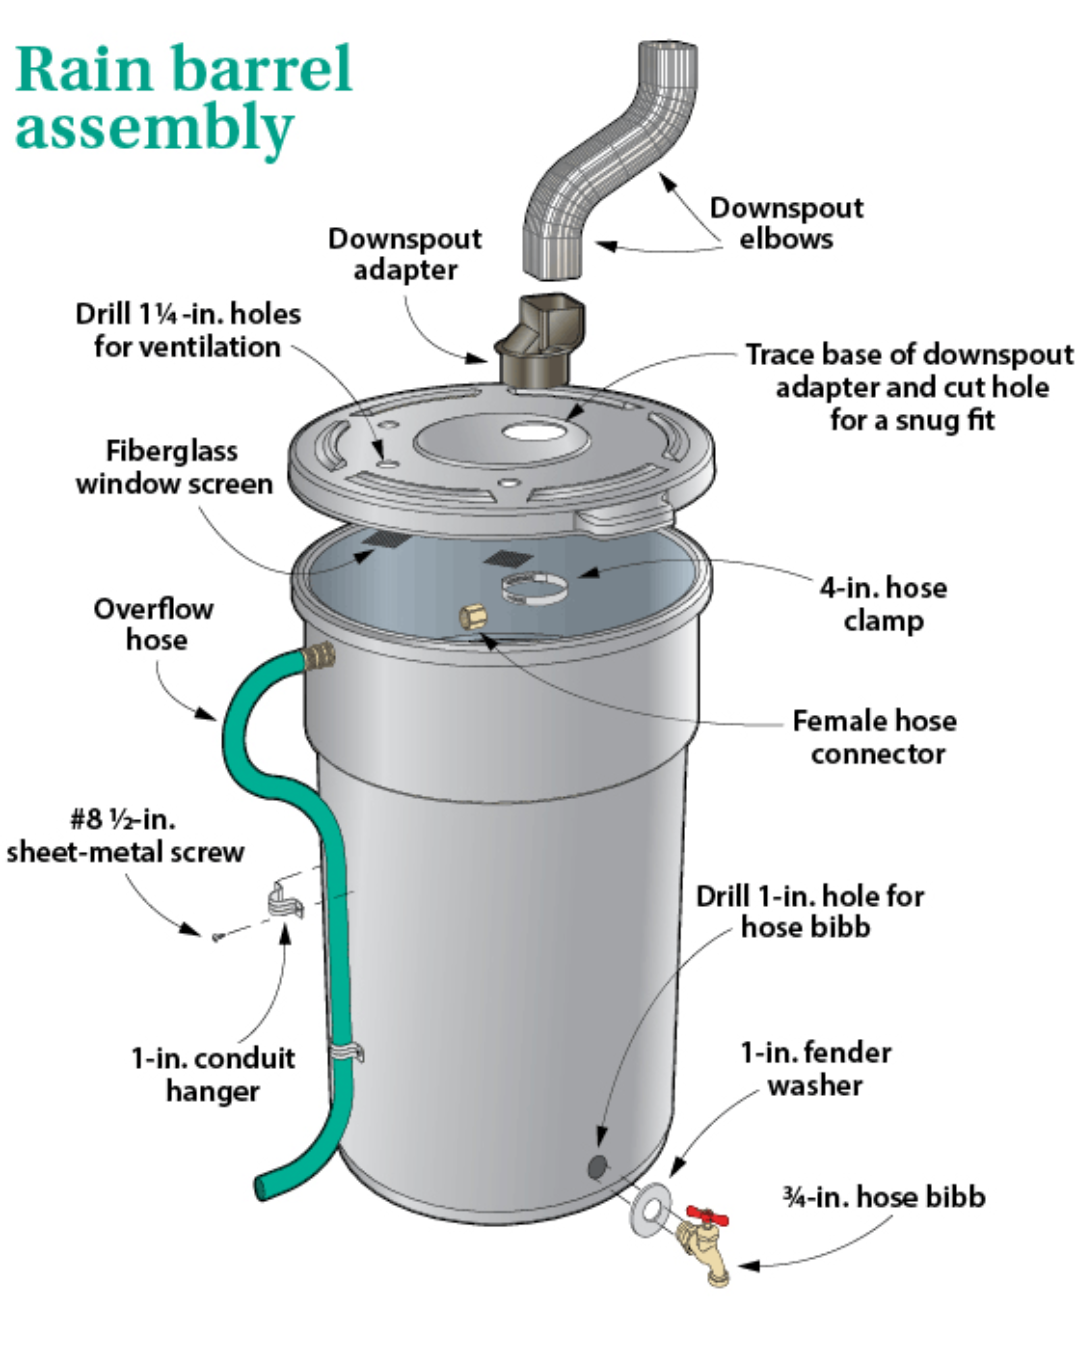
Instructions: Follow these step-by-step instructions to construct your rain barrel:
- Prepare the Barrel: Select a clean, chemical-free barrel and cleanse it thoroughly.
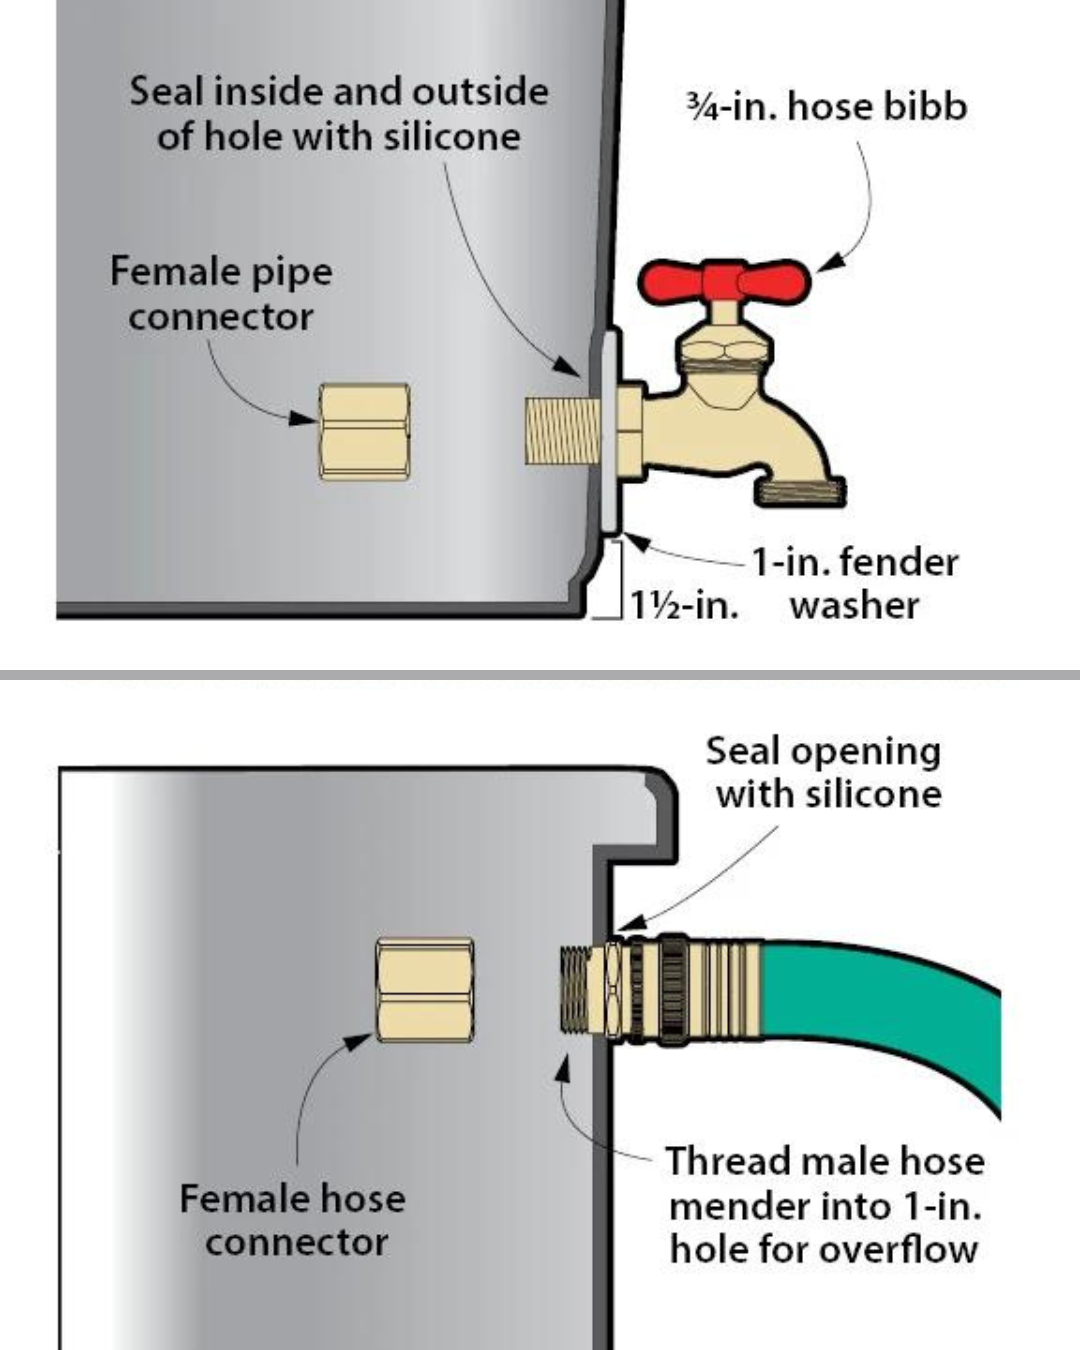
- Create the Spigot Hole:
- Positioning: Drill a hole for the spigot approximately 2-3 inches from the barrel’s bottom.
- Sealing: Apply silicone sealant around the hole and affix the spigot, utilizing Teflon tape for leak-proof threading.
- Install the Overflow Valve:
- Drill an Overflow Hole: Select a suitable spot near the barrel’s top and drill a hole to accommodate the overflow valve.
- Attachment: Seal the hole with silicone, insert the overflow valve, and secure it with a hose clamp.
- Attach the Mesh Screen:
- Cut the Screen: Trim the mesh screen to cover the barrel’s top opening.
- Secure Placement: Affix the screen securely over the opening to prevent debris and insects from entering.
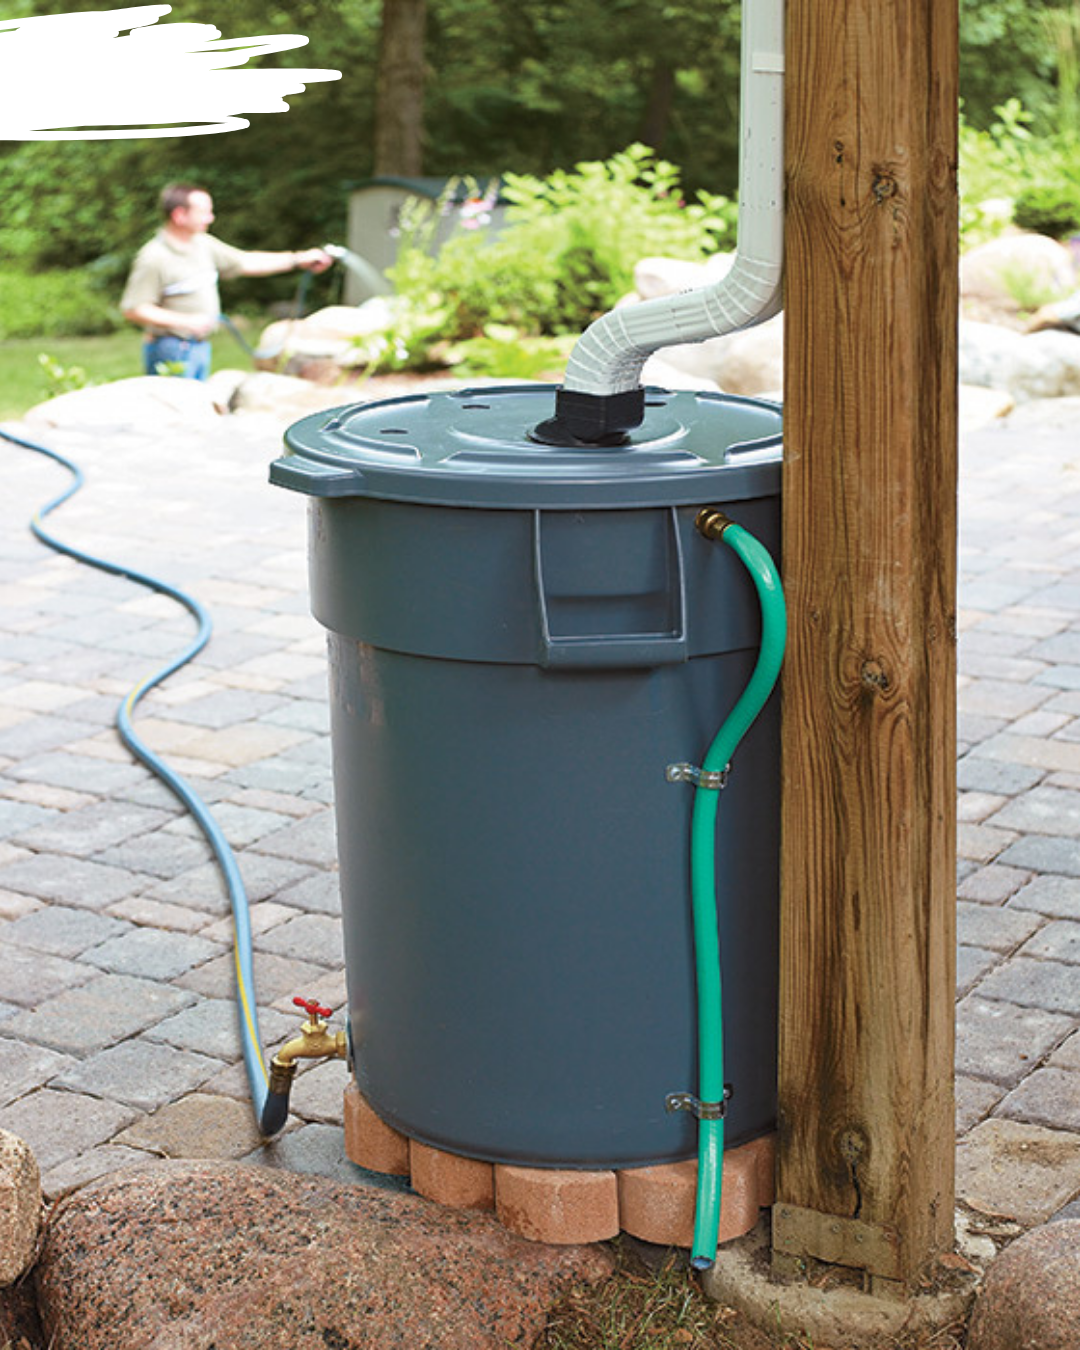
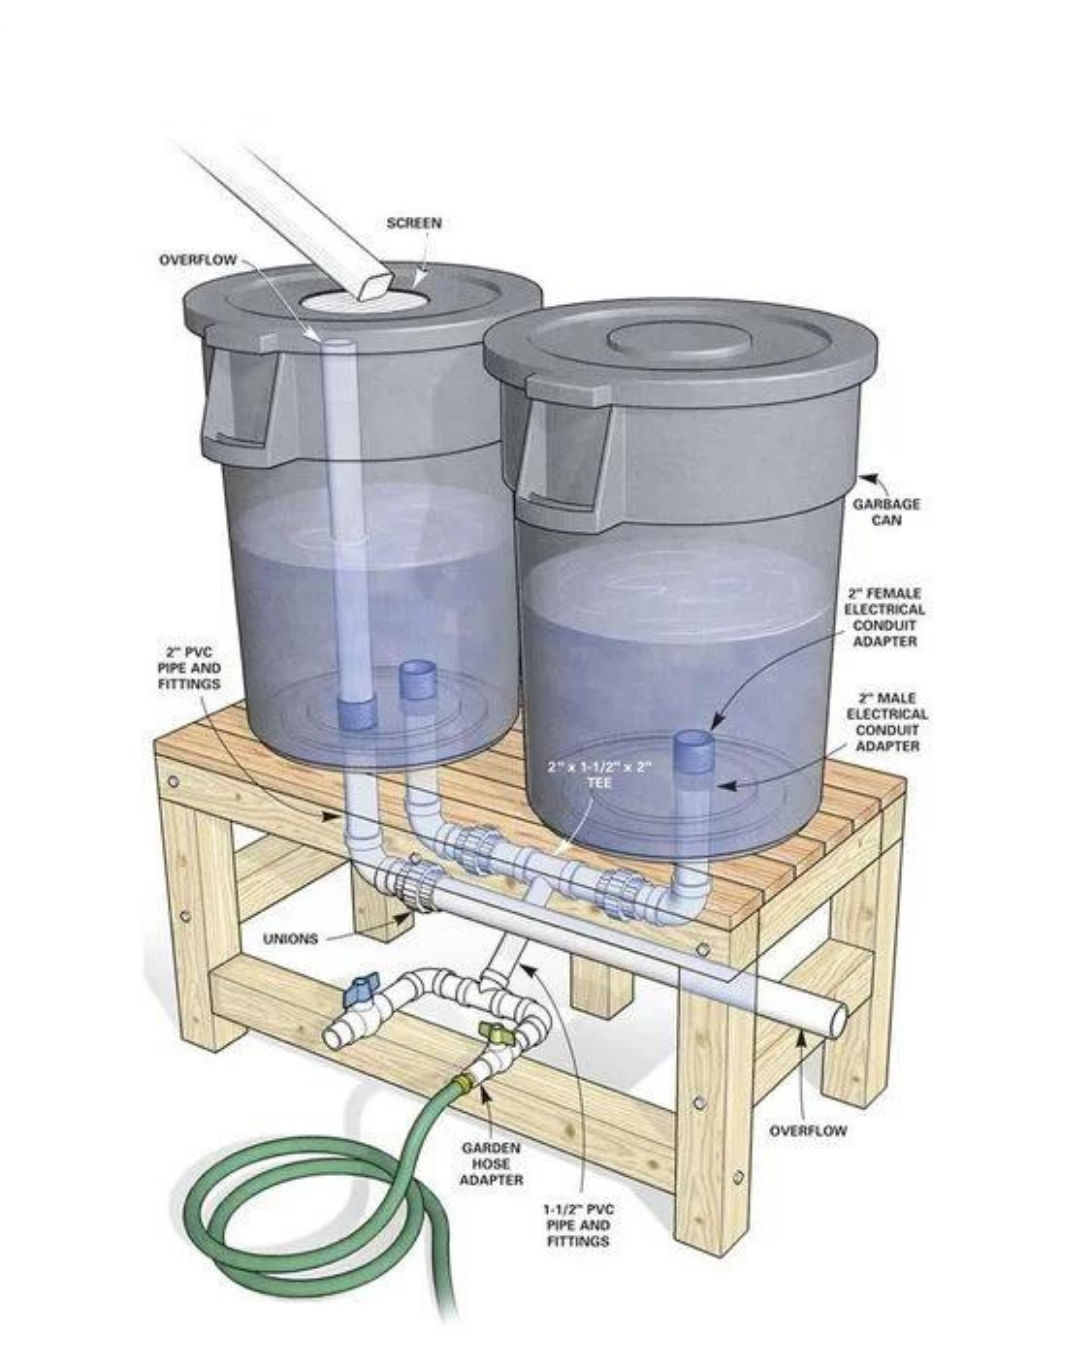
- Set Up the Downspout:
- Barrel Positioning: Place the barrel on a stable, elevated base near a downspout to optimize water pressure and spigot accessibility.
- Downspout Modification: Adjust the downspout’s height to enable direct water flow into the barrel, attaching a diverter or flexible downspout for redirection.
- Secure and Maintain Your Rain Barrel:
- Leak Check: Monitor the barrel during rainfall to detect and rectify any leaks promptly.
- Routine Maintenance: Periodically empty and clean the barrel to deter algae growth and sediment buildup. Ensure the mesh screen remains intact to uphold debris and insect exclusion.
Conclusion: Constructing a rain barrel emerges as a straightforward yet impactful endeavor, offering myriad benefits for both environmental stewardship and garden cultivation. By adhering to these accessible guidelines, you can establish a reliable rainwater harvesting system that conserves water, trims expenses, and champions sustainable living practices. Embark on this journey to harness nature’s bounty and cultivate a greener tomorrow. Happy building!


")


