Creating a thriving home garden starts with the basics, and one of the fundamental steps is the preparation of high-quality seedlings. Today, we’re delving into a detailed guide on how to cultivate seedlings in cells, incorporating a unique blend of peat, sandy soil, and a surprising yet effective ingredient: ground eggshells. This method is designed to foster robust plant growth right from the start. Let’s walk through the process step by step, enhancing our guide with additional insights and tips for the best results.
Materials Needed:
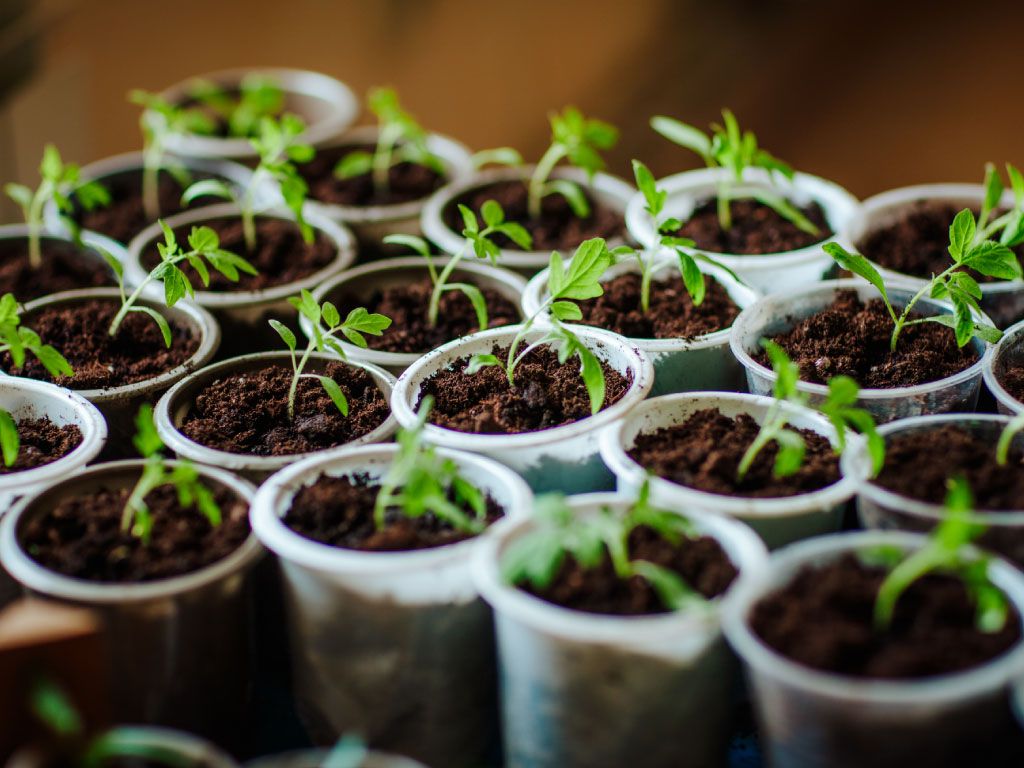
- Cell Trays: These provide individual compartments for each seedling, ensuring they have enough space to grow without competition.
- Peat and Sandy Soil Mix: This combination offers excellent drainage and aeration, key for healthy root development.
- Ground Eggshells: Rich in calcium, eggshells help in strengthening plant cell walls and prevent blossom end rot in certain crops like tomatoes and peppers.
- Warm Water: For moistening the soil mix without overwatering.
- Seeds: Choose high-quality seeds of your desired plants.
- Ruler or Straight Edge: To level the soil in the cells.
- Spray Bottle: For gentle watering that won’t displace the seeds.
Step-by-Step Guide:
1. Prepare the Soil Mix:
Start by creating a nurturing environment for your seeds. Mix peat with sandy soil in equal proportions to ensure good drainage and aeration. The sandy soil lightens the mix, allowing roots to spread easily, while peat retains moisture essential for seed germination.
2. Enrich with Eggshells:
Finely grind eggshells in a blender and blend them into the soil mix. Eggshells add calcium to the soil, reducing acidity and providing essential nutrients that promote healthy plant growth. Ensure the eggshell powder is evenly distributed throughout the mix to prevent nutrient hotspots.
3. Fill the Cells:
Carefully fill each cell with your prepared mix. Use a spoon or small cup to avoid spilling and wastage. Once filled, gently tap the tray on a flat surface to settle the mix without compacting it too much.
4. Level the Surface:
Use a ruler or any straight-edged tool to level the surface of the soil in each cell. This ensures uniformity, making it easier to place seeds and cover them evenly later on.
5. Moisten the Mix:
Before sowing the seeds, lightly spray the soil with warm water using a spray bottle. The water should be warm (not hot) to touch, promoting seed germination without shocking them with cold temperatures. The soil should be moist but not waterlogged.
6. Sow the Seeds:
Place a single seed in the center of each cell. If you accidentally drop more than one, don’t worry. You can thin out the weaker seedlings later, leaving the strongest to grow. The depth at which you sow the seeds depends on their size; a general rule is to plant them twice as deep as their diameter.
7. Cover and Spray Again:
After all the seeds are in place, sprinkle a thin layer of the peat and sandy soil mix over them. Use your ruler to gently press down on this top layer, ensuring contact between seeds and soil. Mist again with warm water to settle the top layer and provide initial moisture.
8. Care and Germination:
Place the cell tray in a warm, well-lit area, avoiding direct sunlight that can overheat and dry out the soil. Keep the soil consistently moist with a spray bottle. Germination times vary by plant species, so refer to your seed packet for specific guidelines.
9. Follow-Up Care:
Once seedlings emerge, it’s crucial to provide adequate light and maintain moisture levels. Thinning out overcrowded cells ensures that the most vigorous seedlings have the space and resources to thrive.
Starting your garden with this methodical approach to seedling preparation can dramatically increase your success rates. By nurturing your plants from the very beginning, you ensure a stronger, more bountiful garden. Remember, gardening is a journey, filled with learning and growth. Keep experimenting, observing, and adapting your methods to find what works best for you and your plants. Happy gardening!


