
Growing your own ginger at home in pots is an exciting and rewarding gardening project. Ginger, with its distinctive flavor and numerous health benefits, can be easily cultivated indoors, allowing you to enjoy a fresh and continuous supply of this versatile root. In this article, we’ll walk you through a step-by-step method for growing ginger at home in pots, enhancing the process for optimal results.
Materials You Will Need:
- Ginger rhizomes
- A plastic container or bowl
- Potting soil mix
- Landscape fabric
- A large pot with a drainage hole
- Wood slice mulch or sawdust
- A paper towel
- Watering can
Method:
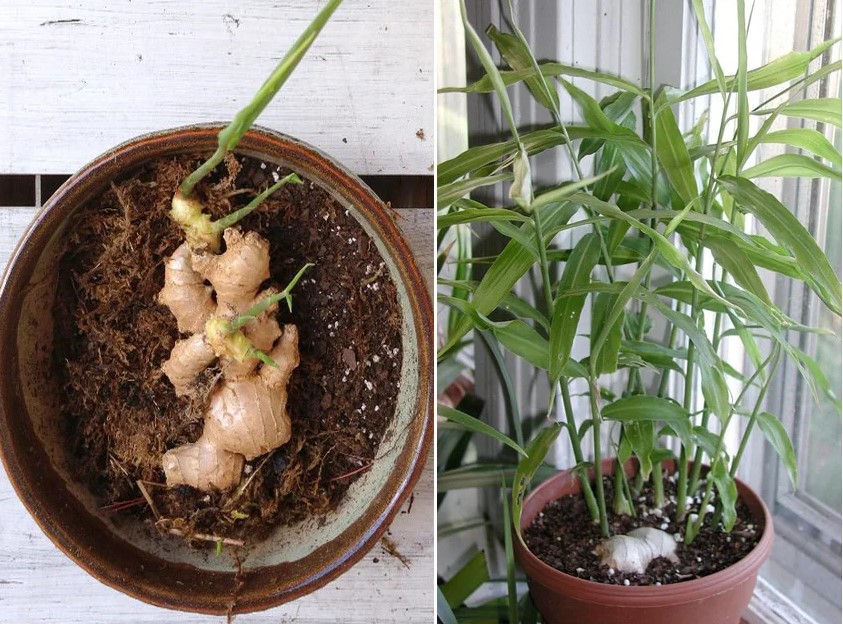
- Selecting Ginger Rhizomes: Start by choosing healthy ginger rhizomes. Look for plump, unblemished pieces that show signs of budding. Each rhizome can yield multiple plants.
- Preparing the Ginger Rhizomes: Place your selected ginger rhizomes in a plastic container or bowl. Add enough water to cover the bottom of the container. This will help to kickstart the sprouting process. Cover the top of the container with a paper towel to keep the rhizomes moist.
- Changing Water: Regularly change the water every 2-3 days to maintain a clean and healthy environment for the ginger rhizomes. This step is crucial for successful sprouting, and you can expect to see sprouts within 10-14 days.
- Selecting a Pot: Once your ginger rhizomes have sprouted, it’s time to prepare a pot for planting. Choose a large pot with a drainage hole to ensure proper water drainage and prevent root rot.
- Using Landscape Fabric: Place landscape fabric over the drain hole in the pot to prevent soil from escaping while still allowing water to flow freely. This will keep your potting mix intact.
- Preparing the Pot: Fill the pot with a well-draining potting soil mix. Ginger prefers loose, well-aerated soil. Make sure to leave some space at the top for planting the ginger rhizomes.
- Planting the Ginger: Plant the ginger rhizomes 2-4 inches deep in the soil with the growth buds pointing upwards. Planting multiple rhizomes in the same pot can yield a more bountiful harvest.
- Covering the Pot: Cover the ginger rhizomes with soil, leaving only the sprouts exposed. Water the soil to ensure it’s well-moistened.
- Mulching the Pot: To maintain soil moisture and provide additional nutrients, spread a layer of wood slice mulch (or sawdust) over the surface of the pot. This mulch layer will also help to regulate the temperature of the soil.
- Watering the Pot: Water your potted ginger regularly but avoid waterlogging. Keep the soil consistently moist, but not soggy, to promote healthy growth.
Conclusion
Growing ginger at home in pots is an enjoyable and practical endeavor. By following these steps and paying attention to the needs of your ginger plants, you can look forward to a successful harvest of fresh ginger to use in your culinary creations. From sprouting ginger rhizomes to nurturing the growing plants in your pot, this method provides you with a clear path to becoming a successful ginger gardener right in the comfort of your home. Enjoy your homegrown ginger and explore the endless culinary possibilities it offers.


