The Art of Rose Pruning: A Step-by-Step Guide for Lush Blooms
Pruning roses might sound intimidating, but it’s crucial for their health and beauty. With a straightforward approach, you can master this task and ensure your roses flourish year after year. Here’s a step-by-step guide to pruning your roses effectively and easily.

- Timing is Key Prune your roses in late winter or early spring before new growth begins, typically between late February and April, depending on your climate and rose variety.
- Gather Your Tools You’ll need clean, sharp bypass pruners, gloves, and optionally, lopping shears and a pruning saw. Disinfect your tools to prevent disease spread.
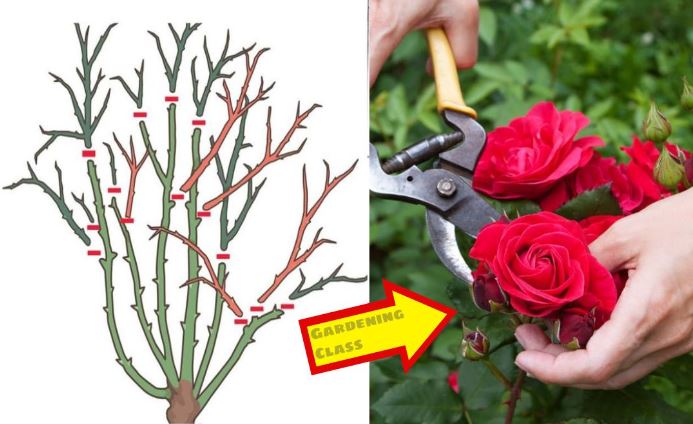
- Assess Your Roses Inspect your bushes for dead, diseased, or damaged wood, as well as any branches that cross or rub against each other.
- Start with Cleanup Remove dead, diseased, or damaged branches, cutting them back to healthy tissue with clean, angled cuts.
- Thin for Air and Light Remove thin, weak growth and interior branches to improve air circulation and light penetration.
- Shape Your Bush Create an open vase shape by cutting about 1/4 inch above an outward-facing bud, encouraging growth in the desired direction.
- Finish Strong Consider applying a sealing compound to larger cuts for protection, though it’s optional. Clean up removed foliage to prevent disease and pest issues.

Aftercare Tips: Water your roses well after pruning and consider applying balanced fertilizer once new growth appears to support their health.
Pruning roses doesn’t have to be daunting. With these seven steps, you can confidently care for your roses and enjoy their vibrant blooms all season long. Happy pruning!


